Source:Goolge.com.pk
Pencil Drawings Of Eagles Biography
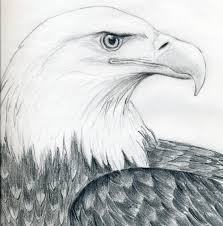
Whether you're creating a design for a traditional crafts project like a quilt or woodburning plaque, or a serious piece of fine art, drawing a bald eagle's head has a few interesting tricks that can make your rendering a lot more realistic!
Read more: How to Draw a Bald Eagle Head and Shoulders | eHow.com http://www.ehow.com/how_2132093_draw-bald-eagle-head-shoulders.html#ixzz21fMPHbnm
His first published work was in Warren's anthology title, Eerie, working on various stories and series including "Hunter" and its sequels, before drawing various Future Shocks for 2000AD for various writers, including Alan Moore.
In 1978 he started working on Hulk Weekly for Marvel UK which had just been drastically revamped by Dez Skinn. During this time he drew various strips for Marvel UK, including Hulk and Nick Fury, plus helping new artists such as Alan Davis.
During the early 1980s he created Madman for Dez Skinn's Warrior before becoming a regular inker for Alan Davis's work for DC Comics. Their most notable work at this time being a run drawing Batman for Detective Comics.
Neary became closely associated with Davis, inking his work from titles such as Uncanny X-Men to Captain Britain. Their working partnership still lasts to the present.
Neary became editor-in-chief of Marvel UK from c. 1990–1993,[1] helping launch a number of US-sized titles in addition to the company's ongoing UK range. This began with Death's Head II and was followed by titles such as Hell's Angel (changed to Dark Angel after a copyright battle with the Hells Angels), Warheads, Digitek and Motormouth (later Motormouth and Killpower). Sales of the comics were initially high but over expansion soon brought an end to Marvel UK's US line, with Panini Comics buying the company's assets, including Doctor Who Magazine.
Neary has since been concentrating on inking since then. He has inked Bryan Hitch's work on The Authority and is now regularly working with Hitch on The Ultimates for Marvel Comics.
First, use your ruler to mark off the finish size of your artwork. Create an area on the page that fits a standard size small or large frame, leaving at least 1/4" around it to mat the artwork.
Sketch or trace your photo reference in outline only. Lightly outline the areas of shadow on the eagle's white head. This is important for establishing three dimensional depth. Don't be embarrassed about tracing. Many professional wildlife artists take their own photo references, then enlarge and trace them with a scanner and printer.
Sketch lightly, or use a hard H range pencil to do the sketch. Be sure to get all the lines where colors are going to change, as if you're preparing to make a "Color by Number" drawing. This is how most professional wildlife artists begin their paintings and drawings.
My scan is a little darkened, but you can see the lines in the image and that's the important thing. With tinted paper, you won't have to draw a background because the paper itself makes a good background. If you use white paper, plan to fill in around the background.
2
If you're using a white background, now is the time to fill in the background first.
Otherwise, begin with the eagle's whitest head feathers, the ones highlighted in your reference. Ignore any feathers that look blue, violet or brown, we'll get to those later. Start with the white highlight on the top of his beak, then start where his head feathers meet his beak.
Press hard at the start of each stroke, then flick the pencil back lifting it as you go in the direction of the feathers. On birds it's important to look closely at the reference and make your strokes go in the direction of the feathers, also to "feather" your strokes slightly by lifting them. Do short overlapping strokes. This will create a soft featherlike texture, which zigzagging across the area to fill it in strongly would not do.
It takes a little longer to draw this way, but the results are great once you get used to realism in wildlife art! This method is best for all smooth, soft feathers that don't show individually. If you can't tell which way feathers in an area go, assume they flow back from the bird's forehead and then down and around the bird's body.
Keep your colored pencils sharpened. A fine point can imply more details as the strokes get heavier or softer than a blunt point, for feather textures a fine point helps a lot.
If the white in your colored pencil set isn't strong enough, consider using a white chalk or white charcoal pencil with it, or wait till you're entirely done and very carefully use a clean white oil pastel to give it a little more brightness. If a feather stroke goes a little out of place, don't worry -- it will either be covered by another stroke or look as if it's disarranged. Extend a little edge of highlighting part of the way down from the head as if backlit, that will help give an impression of bright sunlight.


Pencil Drawings Of Eagles Biography
Whether you're creating a design for a traditional crafts project like a quilt or woodburning plaque, or a serious piece of fine art, drawing a bald eagle's head has a few interesting tricks that can make your rendering a lot more realistic!
Read more: How to Draw a Bald Eagle Head and Shoulders | eHow.com http://www.ehow.com/how_2132093_draw-bald-eagle-head-shoulders.html#ixzz21fMPHbnm
His first published work was in Warren's anthology title, Eerie, working on various stories and series including "Hunter" and its sequels, before drawing various Future Shocks for 2000AD for various writers, including Alan Moore.
In 1978 he started working on Hulk Weekly for Marvel UK which had just been drastically revamped by Dez Skinn. During this time he drew various strips for Marvel UK, including Hulk and Nick Fury, plus helping new artists such as Alan Davis.
During the early 1980s he created Madman for Dez Skinn's Warrior before becoming a regular inker for Alan Davis's work for DC Comics. Their most notable work at this time being a run drawing Batman for Detective Comics.
Neary became closely associated with Davis, inking his work from titles such as Uncanny X-Men to Captain Britain. Their working partnership still lasts to the present.
Neary became editor-in-chief of Marvel UK from c. 1990–1993,[1] helping launch a number of US-sized titles in addition to the company's ongoing UK range. This began with Death's Head II and was followed by titles such as Hell's Angel (changed to Dark Angel after a copyright battle with the Hells Angels), Warheads, Digitek and Motormouth (later Motormouth and Killpower). Sales of the comics were initially high but over expansion soon brought an end to Marvel UK's US line, with Panini Comics buying the company's assets, including Doctor Who Magazine.
Neary has since been concentrating on inking since then. He has inked Bryan Hitch's work on The Authority and is now regularly working with Hitch on The Ultimates for Marvel Comics.
First, use your ruler to mark off the finish size of your artwork. Create an area on the page that fits a standard size small or large frame, leaving at least 1/4" around it to mat the artwork.
Sketch or trace your photo reference in outline only. Lightly outline the areas of shadow on the eagle's white head. This is important for establishing three dimensional depth. Don't be embarrassed about tracing. Many professional wildlife artists take their own photo references, then enlarge and trace them with a scanner and printer.
Sketch lightly, or use a hard H range pencil to do the sketch. Be sure to get all the lines where colors are going to change, as if you're preparing to make a "Color by Number" drawing. This is how most professional wildlife artists begin their paintings and drawings.
My scan is a little darkened, but you can see the lines in the image and that's the important thing. With tinted paper, you won't have to draw a background because the paper itself makes a good background. If you use white paper, plan to fill in around the background.
2
If you're using a white background, now is the time to fill in the background first.
Otherwise, begin with the eagle's whitest head feathers, the ones highlighted in your reference. Ignore any feathers that look blue, violet or brown, we'll get to those later. Start with the white highlight on the top of his beak, then start where his head feathers meet his beak.
Press hard at the start of each stroke, then flick the pencil back lifting it as you go in the direction of the feathers. On birds it's important to look closely at the reference and make your strokes go in the direction of the feathers, also to "feather" your strokes slightly by lifting them. Do short overlapping strokes. This will create a soft featherlike texture, which zigzagging across the area to fill it in strongly would not do.
It takes a little longer to draw this way, but the results are great once you get used to realism in wildlife art! This method is best for all smooth, soft feathers that don't show individually. If you can't tell which way feathers in an area go, assume they flow back from the bird's forehead and then down and around the bird's body.
Keep your colored pencils sharpened. A fine point can imply more details as the strokes get heavier or softer than a blunt point, for feather textures a fine point helps a lot.
If the white in your colored pencil set isn't strong enough, consider using a white chalk or white charcoal pencil with it, or wait till you're entirely done and very carefully use a clean white oil pastel to give it a little more brightness. If a feather stroke goes a little out of place, don't worry -- it will either be covered by another stroke or look as if it's disarranged. Extend a little edge of highlighting part of the way down from the head as if backlit, that will help give an impression of bright sunlight.
Pencil Drawings Of Eagles
Pencil Drawings Of Eagles
Pencil Drawings Of Eagles
Pencil Drawings Of Eagles
Pencil Drawings Of Eagles
Pencil Drawings Of Eagles
Pencil Drawings Of Eagles
Pencil Drawings Of Eagles
Pencil Drawings Of Eagles
Pencil Drawings Of Eagles
Eagle Drawing With Black Pencil
Eagle Or Hawk Pencil Drawing
No comments:
Post a Comment